Leave a Message

Thank you for your message. We will be in touch with you shortly.

Staging A Classic Upper West Side Co-op To Stand Out

February 19, 2026

Your prewar co-op has soul. But today’s Upper West Side buyers will compare it to glossy, renovated condos and expect move-in-ready ease. If you want top dollar and a quicker sale, staging and a few strategic cosmetic updates can put your home at the front of the line. In this guide, you’ll learn where to invest, how to navigate co-op rules, and the step-by-step timeline to launch confidently. Let’s dive in.

Why staging moves the needle on the UWS

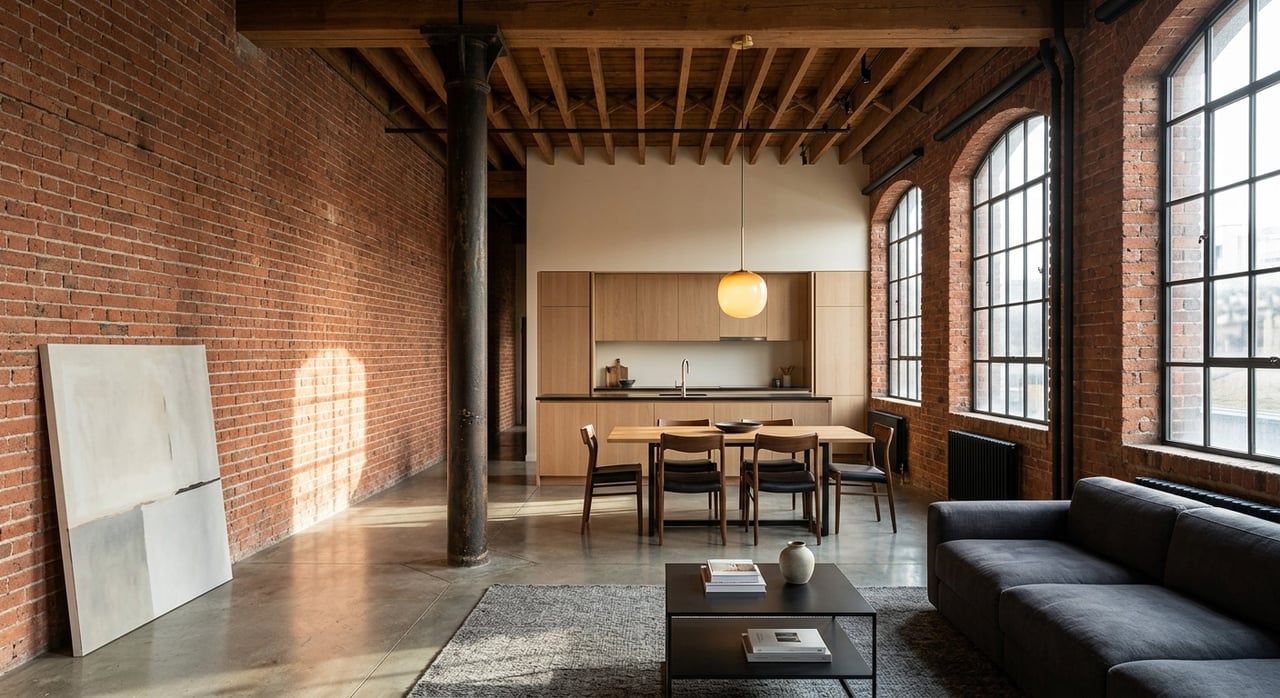
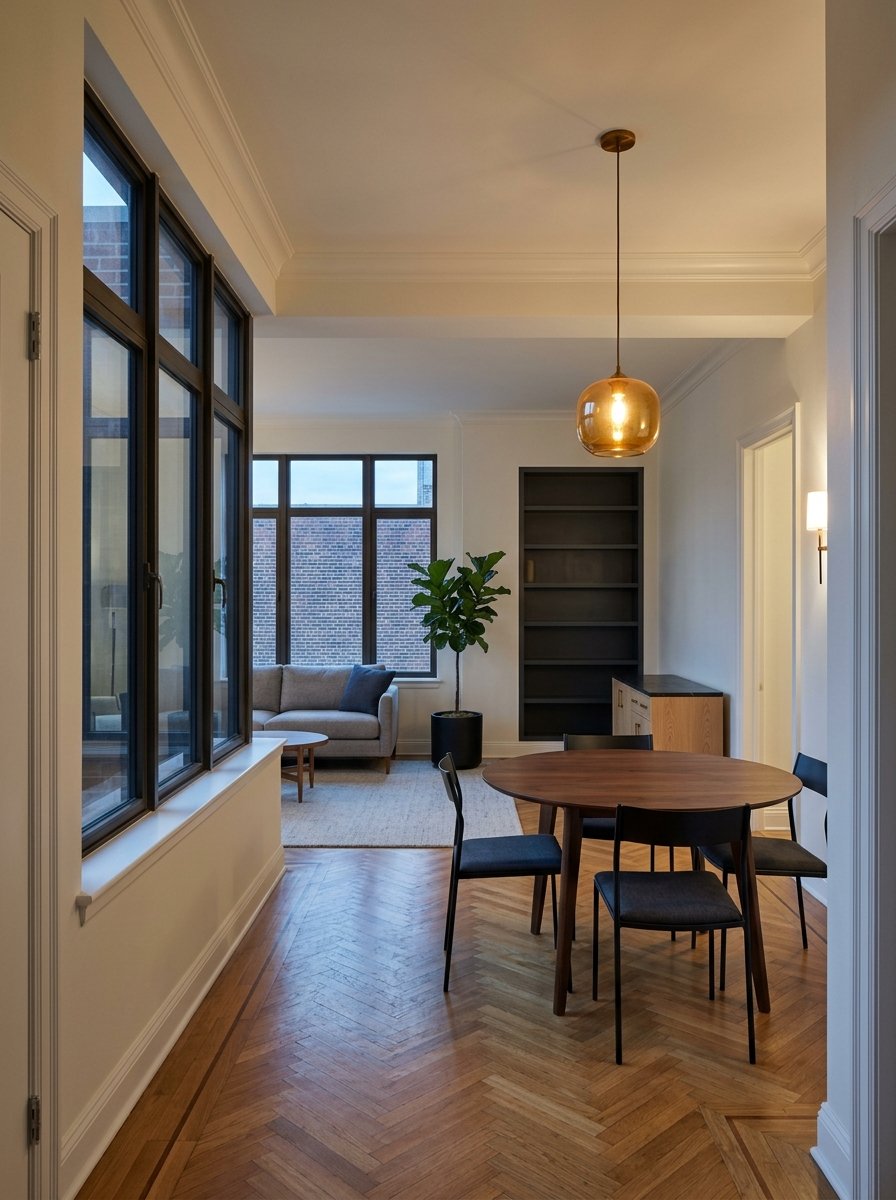
Buyers in Manhattan often prize turnkey condition and convenience. They respond to listings that make daily life easy to picture. Industry research shows staging helps buyers visualize how they would live in a space and can shorten days on market. On the Upper West Side, the winning look blends preserved prewar character with clean, modern kitchens and baths plus a flexible nook for work or guests.

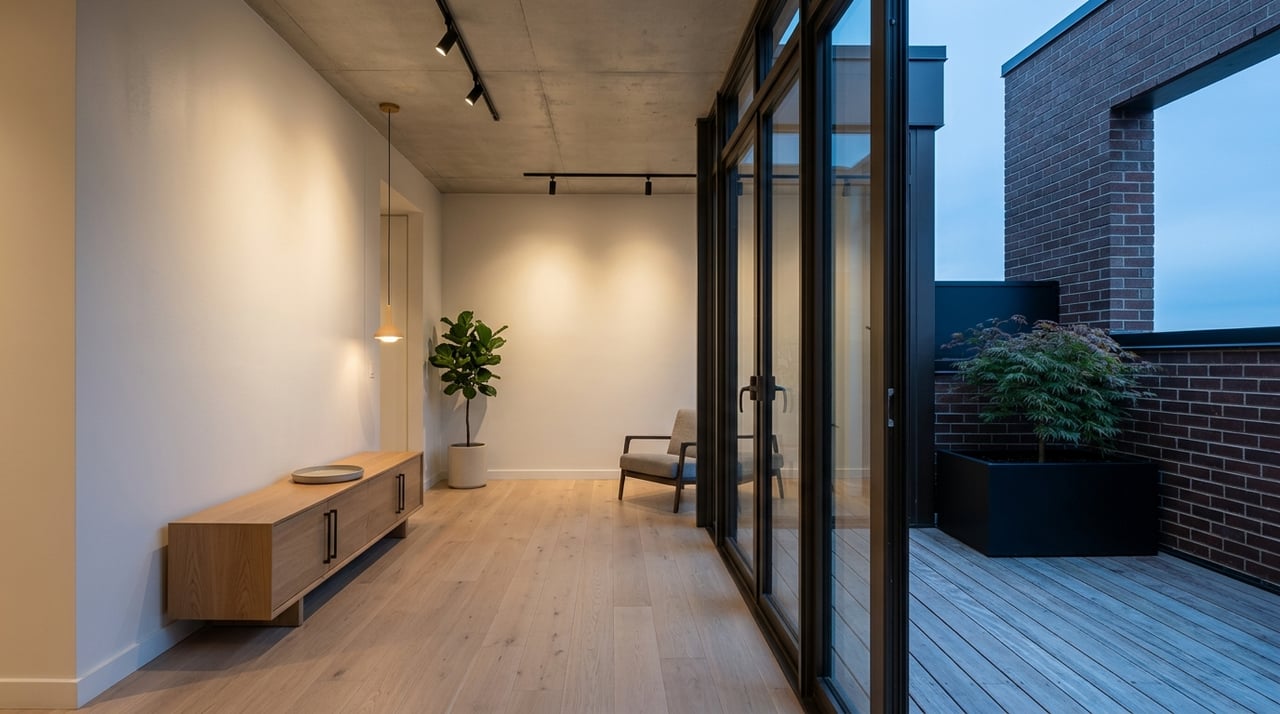
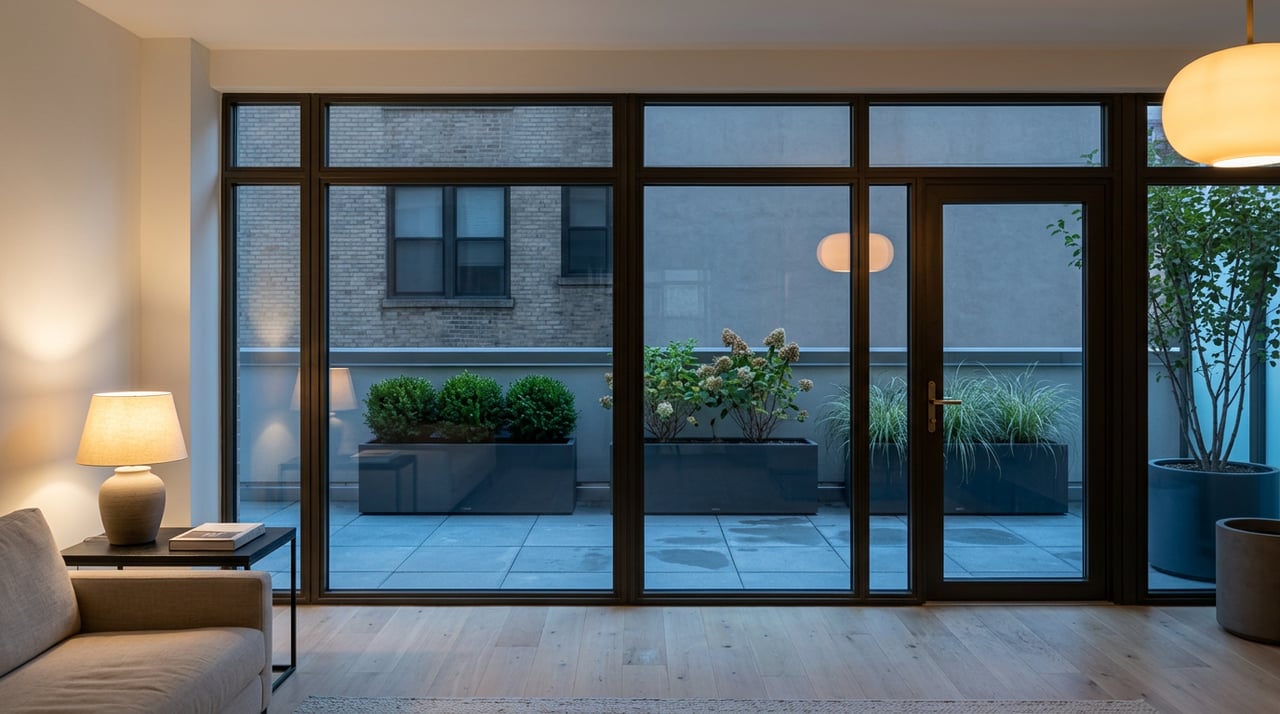
Focus your spend where buyers look most: living room, primary bedroom, and kitchen. Also highlight practical amenities such as storage, laundry access, light and sightlines, and building services. Your goal is to remove friction and let the architecture shine.

Understand co-op rules before you start

Board approvals and alteration agreements

Most co-ops require an alteration agreement for anything beyond minor cosmetics. Expect to submit contractor insurance, a protection plan, and possibly deposits and review fees. Straightforward board reviews often take 2 to 6 weeks, though timing can stretch if the board meets infrequently or requests additional review. Even for staging, painting, or photography, confirm building requirements like certificates of insurance and elevator reservations.

When NYC permits apply

In New York City, work that moves plumbing or gas, alters electrical service, or removes walls typically requires Department of Buildings filings prepared by a registered design professional. If you are painting, refinishing floors, changing hardware, or replacing counters without moving plumbing or electrical, you can often avoid DOB permits. Plan 6 to 12 or more weeks for approvals if you intend to reconfigure kitchens or baths, add laundry, or relocate systems.

Building logistics to plan around

Reserve the elevator for vendor deliveries and furniture drops. Many buildings require hall protection, vendor sign-in, and specific work hours. You may also be asked for refundable deposits or escrows for larger projects. Confirm all logistics with management 1 to 2 weeks before any staging or photo day.

A seller-first staging plan for a classic co-op

Step 1: Declutter and deep clean

Remove personal photos and collections to neutralize the space. Edit surfaces and closets to show generous storage. A spotless, pared-back home photographs better and helps buyers focus on light, scale, and detail.

Step 2: Paint and small repairs

Use a neutral, light palette that makes moldings pop and ceiling height read clearly. Patch, caulk, and touch up trim and window surrounds. Simple fixes change the overall feel and reassure buyers about maintenance.

Step 3: Lighting that flatters

Layer ambient, task, and accent lighting. Swap in warm, bright LED bulbs for consistent color in photos. If appropriate, add undercabinet lighting in the kitchen to modernize the look without opening walls.

Step 4: Floors that honor the era

Refinish original hardwood when possible. Sand-and-refinish preserves prewar character and typically reads better than replacement. If you must replace, choose a neutral-toned engineered wood that complements existing details.

Step 5: Kitchen refresh over a gut

Favor cabinet refacing or repainting, new hardware, a fresh countertop and backsplash, and midrange modern appliances. Minor kitchen remodels often recoup a strong share of their cost relative to full guts and avoid board and DOB complexity. Keep plumbing in place to save time and approvals.

Step 6: Bath refresh that feels new

Re-caulk and re-grout, reglaze a tub if worn, and update mirrors, lighting, faucets, and vanities. Keep the layout if possible to avoid permit triggers. Clean, classic fixtures with modern function fit prewar spaces well.

Step 7: Strategic staging to define use

Rent furniture or bring in a professional stager to clarify room purpose. Stage a functional home-office corner if you lack a dedicated office. Prioritize the living room, primary bedroom, and kitchen for the greatest impact.

Preserve character, signal turnkey

Highlight original moldings, built-ins, and fireplaces. Clean, repair, and refinish rather than remove. Use finishes that are contemporary but sympathetic, such as shaker-style cabinetry, slim-profile stone counters, and matte black or brass hardware. Avoid overly bright wallpapers or highly personalized decor that can distract from the architecture.

Room-by-room ideas that work

  • Living room: Use scaled furniture that respects ceiling height and traffic flow. Choose a neutral rug and remove heavy drapery that blocks light. Capture a wide shot that shows moldings and sightlines.
  • Kitchen: Refresh fronts, hardware, counters, and lighting. If you have a breakfast nook, stage it with bistro seating to underscore daily utility. Note appliance brands and ages in your listing materials when helpful.
  • Primary bedroom: Keep bedding neutral and minimize bulky furniture. If space allows, stage a small desk vignette to suggest flexibility.
  • Bathroom: Regrout, recaulk, and polish everything to a hotel-level clean. Classic, well-scaled fixtures signal quality and ease.
  • Entry and hallway: Add slim storage solutions that feel integrated. Thoughtful hooks, a narrow console, and concealed shoe storage address common closet concerns.

Photos, floor plans, and media

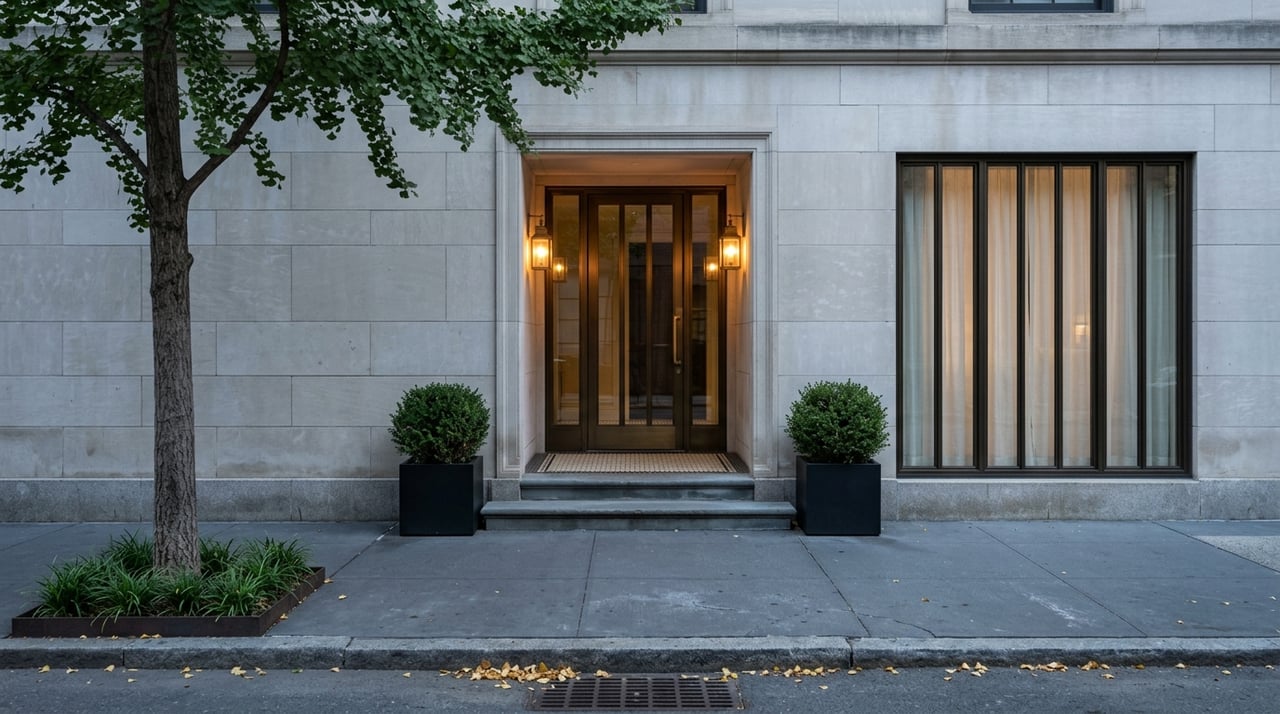
Professional photography is essential. Include images that celebrate prewar details along with strong kitchen and primary bath shots. Consider a twilight exterior or streetscape to sell the Upper West Side setting. Always include a clear, accurate floor plan. If you use virtual staging for a vacant unit, disclose it plainly.

Costs, ROI, and who you need on your team

The right vendors

  • Listing broker with Upper West Side co-op expertise
  • Professional stager for occupied or vacant staging
  • Photographer and floor plan provider
  • General contractor experienced with co-op rules and management coordination
  • Registered architect or professional engineer if you plan permitted work
  • Licensed master plumber and licensed electrician for any systems changes
  • Moving and logistics pro for elevator reservations and protection

Choose vendors who have worked in your building or similar UWS co-ops. Familiarity with COIs, elevator protection, and scheduling reduces friction.

Typical costs and deposits

  • Staging: Consultations and partial occupied staging commonly run in the low thousands for set-up, with vacant full-apartment staging reaching several thousand per month plus installation. These costs are modest compared with the faster sales and stronger offers many agents report for staged homes.
  • Board and alteration fees: Many co-ops charge review fees of roughly $1,000 to $5,000 and require refundable deposits or escrows that often fall in the $5,000 to $20,000 range, depending on scope and building. Always confirm with your managing agent.
  • Kitchen and bath refresh: Minor kitchen remodels and midrange bath updates often recoup a higher share of costs than large-scale overhauls. Start with the lowest-cost, highest-impact updates before considering major reconfigurations.

A 6–12 month timeline that works

  • 10–12 months out: Meet with a local listing broker to set your target window and identify high-impact fixes. Ask for stager and contractor referrals with co-op experience.
  • 6–9 months out: If you plan any work that affects plumbing, electrical, or layout, engage an architect or engineer and submit an alteration package. Begin DOB filings if needed.
  • 3–6 months out: Complete cosmetic work like paint, lighting, hardware swaps, counters, and floor refinishing. Schedule staging and confirm building logistics.
  • 2–4 weeks before photos: Finish staging, deep clean, and shoot the listing. Verify floor plan accuracy and prepare copy that highlights storage, laundry access, and building services.
  • Listing week: Finalize showing instructions and coordinate staging removal timing post-acceptance. Confirm move logistics for closing.

Common pitfalls to avoid

  • Skipping board or DOB checks. Even small changes can trigger reviews or permits. Unapproved work can create closing issues later.
  • Over-improving. Full-gut renovations risk longer timelines and weaker cost recovery. Lead with paint, lighting, selective kitchen and bath refreshes, and professional staging.
  • Staging over defects. Repair first. Buyers and inspectors will notice unresolved issues.

Ready to stand out on the Upper West Side?

A classic co-op can compete head-to-head with renovated condos when it reads as move-in ready and thoughtfully presented. If you prioritize the right updates, plan around co-op logistics, and tell a clear visual story, you give buyers the confidence to act. For a tailored plan, vetted vendor introductions, and board-savvy execution, schedule a private consultation with Fainna Kagan.

FAQs

Do Upper West Side co-ops require board approval for staging?

  • Staging itself usually does not require formal alteration approval, but most buildings require vendor certificates of insurance, elevator reservations, and hall protection. Check your house rules and confirm with management.

When do NYC permits apply for light updates in a co-op?

  • Painting, refinishing floors, swapping hardware, or replacing counters without moving plumbing or electrical typically do not require DOB permits. Moving plumbing or gas, changing electrical service, or altering walls generally does.

Which rooms should I stage first to maximize impact?

  • Focus on the living room, primary bedroom, and kitchen. These spaces most influence buyer perception and photography, especially in Manhattan.

What is a realistic budget for staging a Manhattan co-op?

  • Expect the low thousands for an occupied-staging consultation and partial set-up, and several thousand for vacant, full-apartment staging with monthly furniture rental plus installation.

How far in advance should I start board and permit steps?

  • If any scope touches plumbing, electrical, or layout, begin as soon as you decide to renovate. Combined board review and DOB filings can take 6 to 12 or more weeks, depending on scope and building cadence.

Work With Fainna

Known for her commitment and responsiveness to her clients, Fainna Kagan has repeatedly set records on the highest selling priced properties. Connect with her today!